
Tengstrand's Blog
The search for simpler code while having fun.
The search for simpler code while having fun.
In this blog series, I will implement a self-playing Tetris program in Clojure and Python using the Polylith architecture and compare the two solutions along the way.
The goal for this first post is to place a T piece on a Tetris board (represented by a two-dimensional array):
[[0 0 0 0 0 0 0 0 0 0]
 [0 0 0 0 0 0 0 0 0 0]
 [0 0 0 0 0 0 0 0 0 0]
 [0 0 0 0 0 0 0 0 0 0]
 [0 0 0 0 0 0 0 0 0 0]
 [0 0 0 0 0 0 0 0 0 0]
 [0 0 0 0 0 0 0 0 0 0]
 [0 0 0 0 0 0 0 0 0 0]
 [0 0 0 0 0 0 0 0 0 0]
 [0 0 0 0 0 0 0 0 0 0]
 [0 0 0 0 0 0 0 0 0 0]
 [0 0 0 0 0 0 0 0 0 0]
 [0 0 0 0 0 0 0 0 0 0]
 [0 0 0 0 0 0 T 0 0 0]
 [0 0 0 0 0 T T T 0 0]]]
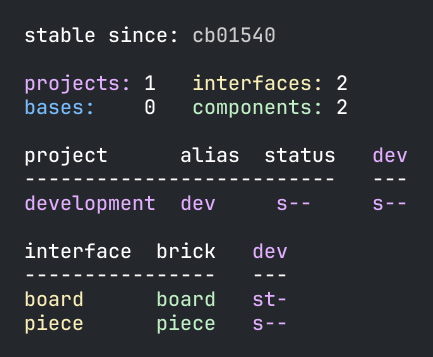
We will put the code in the piece and board components in a Polylith workspace (output from the info command):
This will not be a complete guide to Polylith, Clojure, or Python, but I will explain the most important parts and refer to relevant documentation when needed.
The resulting source code from this blog post (part 1) can be found here:
We begin by installing the poly command line tool for Clojure, which we will use when working with the Polylith codebase:
brew install polyfy/polylith/poly
The next step is to create a Polylith workspace:
poly create workspace name:tetris-polylith top-ns:tetrisanalyzer
We now have a standard Polylith workspace for Clojure in place:
▾ tetris-polylith
  ▸ bases
  ▸ components
  ▸ development
  ▸ projects
  deps.edn
  workspace.edn
We will use uv as package manager for Python (see setup for other alternatives). First we install uv:
curl -LsSf https://astral.sh/uv/install.sh | sh
Then we create the tetris-polylith-uv workspace directory, by executing:
uv init tetris-polylith-uv
cd tetris-polylith-uv
uv add polylith-cli --dev
uv sync
which creates:
README.md
main.py
pyproject.toml
uv.lock
Finally we create the standard Polylith workspace structure:
uv run poly create workspace --name tetrisanalyzer --theme loose
which adds:
▾ tetris-polylith-uv
  ▸ bases
  ▸ components
  ▸ development
  ▸ projects
  workspace.toml
The workspace requires some additional manual steps, documented here.
Now we are ready to create our first component for the Clojure codebase:
poly create component name:piece
This adds the piece component to the workspace structure:
  ▾ components
    ▾ piece
      ▾ src
        ▾ tetrisanalyzer
          ▾ piece
            interface.clj
            core.clj
      ▾ test
        ▾ tetrisanalyzer
          ▾ piece
            interface-test.clj
If you have used Polylith with Clojure before, you know that you also need to manually add piece to deps.edn, which is described here.
Let's do the same for Python:
uv run poly create component --name piece
This adds the piece component to the structure:
  ▾ components
    ▾ tetrisanalyzer
      ▾ piece
        __init__.py
        core.py
  ▾ test
    ▾ components
      ▾ tetrisanalyzer
        ▾ piece
          __init__.py
          test_core.py
In Tetris, there are 7 different pieces that can be rotated, summing up to 19 shapes:
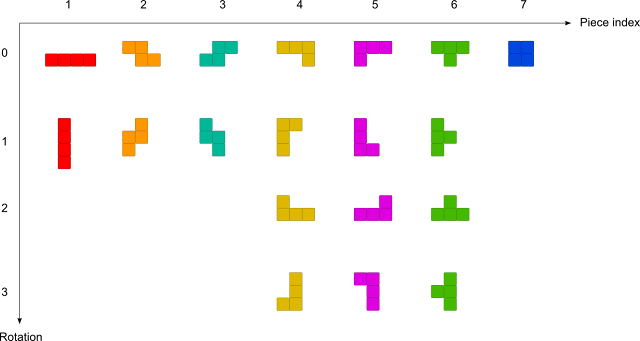
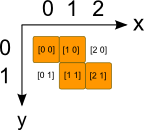
Here we will store them in a multi-dimensional array where each possible piece shape is made up of four [x,y] cells, with [0,0] representing the upper left corner.
For example the Z piece in its inital position (rotation 0) consists of the cells [0,0] [1,0] [1,1] [2,1]:
This is how it looks like in Clojure (commas are treated as white spaces in Clojure and are often omitted):
(ns tetrisanalyzer.piece.piece)

(def pieces [nil

             ;; I (1)
             [[[0 0] [1 0] [2 0] [3 0]]
              [[0 0] [0 1] [0 2] [0 3]]]

             ;; Z (2)
             [[[0 0] [1 0] [1 1] [2 1]]
              [[1 0] [0 1] [1 1] [0 2]]]

             ;; S (3)
             [[[1 0] [2 0] [0 1] [1 1]]
              [[0 0] [0 1] [1 1] [1 2]]]

             ;; J (4)
             [[[0 0] [1 0] [2 0] [2 1]]
              [[0 0] [1 0] [0 1] [0 2]]
              [[0 0] [0 1] [1 1] [2 1]]
              [[1 0] [1 1] [0 2] [1 2]]]

             ;; L (5)
             [[[0 0] [1 0] [2 0] [0 1]]
              [[0 0] [0 1] [0 2] [1 2]]
              [[2 0] [0 1] [1 1] [2 1]]
              [[0 0] [1 0] [1 1] [1 2]]]

             ;; T (6)
             [[[0 0] [1 0] [2 0] [1 1]]
              [[0 0] [0 1] [1 1] [0 2]]
              [[1 0] [0 1] [1 1] [2 1]]
              [[1 0] [0 1] [1 1] [1 2]]]

             ;; O (7)
             [[[0 0] [1 0] [0 1] [1 1]]]])
Here is how it looks in Python:
pieces = [None,

          # I (1)
          [[[0, 0], [1, 0], [2, 0], [3, 0]],
           [[0, 0], [0, 1], [0, 2], [0, 3]]],

          # Z (2)
          [[[0, 0], [1, 0], [1, 1], [2, 1]],
           [[1, 0], [0, 1], [1, 1], [0, 2]]],

          # S (3)
          [[[1, 0], [2, 0], [0, 1], [1, 1]],
           [[0, 0], [0, 1], [1, 1], [1, 2]]],

          # J (4)
          [[[0, 0], [1, 0], [2, 0], [2, 1]],
           [[0, 0], [1, 0], [0, 1], [0, 2]],
           [[0, 0], [0, 1], [1, 1], [2, 1]],
           [[1, 0], [1, 1], [0, 2], [1, 2]]],

          # L (5)
          [[[0, 0], [1, 0], [2, 0], [0, 1]],
           [[0, 0], [0, 1], [0, 2], [1, 2]],
           [[2, 0], [0, 1], [1, 1], [2, 1]],
           [[0, 0], [1, 0], [1, 1], [1, 2]]],

          # T (6)
          [[[0, 0], [1, 0], [2, 0], [1, 1]],
           [[0, 0], [0, 1], [1, 1], [0, 2]],
           [[1, 0], [0, 1], [1, 1], [2, 1]],
           [[1, 0], [0, 1], [1, 1], [1, 2]]],

          # O (7)
          [[[0, 0], [1, 0], [0, 1], [1, 1]]]]
In Clojure we had to specify the namespace at the top of the file, but in Python, the namespace is implicitly given based on the directory hierarchy.
Here we put the above code in shape.py, and it will therefore automatically belong to the tetrisanalyzer.piece.shape module:
▾ tetris-polylith-uv
  ▾ components
    ▾ tetrisanalyzer
      ▾ piece
        __init__.py
        shape.py
In Polylith, only what's in the component's interface is exposed to the rest of the codebase.
In Python, we can optionally control what gets exposed in wildcard imports (from module import *) by defining the __all__ variable in the __init__.py module. However, even without __all__, all public names (those not starting with _) are still accessible through explicit imports.
This is how the piece interface in __init__.py looks like:
from tetrisanalyzer.piece.core import I, Z, S, J, L, T, O, piece

__all__ = ["I", "Z", "S", "J", "L", "T", "O", "piece"]
We could have put all the code directly in __init__.py, but it's a common pattern in Python to keep this module clean by delegating to implementation modules like core.py:
from tetrisanalyzer.piece import shape

I = 1
Z = 2
S = 3
J = 4
L = 5
T = 6
O = 7

def piece(p, rotation):
    return shape.pieces[p][rotation]
The piece component now has these files:
▾ tetris-polylith-uv
  ▾ components
    ▾ tetrisanalyzer
      ▾ piece
        __init__.py
        core.py
        shape.py
In Clojure, the interface is often just a single namespace with the name interface:
  ▾ components
    ▾ piece
      ▾ src
        ▾ tetrisanalyzer
          ▾ piece
            interface.clj
which is implemented like this:
(ns tetrisanalyzer.piece.interface
  (:require [tetrisanalyzer.piece.shape :as shape]))

(def I 1)
(def Z 2)
(def S 3)
(def J 4)
(def L 5)
(def T 6)
(def O 7)

(defn piece [p rotation]
  (get-in shape/pieces [p rotation]))
Let's see what differences there are in the two languages:
;; Clojure
(defn piece [p rotation]
  (get-in shape/pieces [p rotation]))
# Python
def piece(p, rotation):
    return shape.pieces[p][rotation]
An obvious difference here is that Clojure is a Lisp dialect, while Python uses a more traditional syntax. This means that if you want anything to happen in Clojure, you put it first in a list:
(defn piece ...)
(def piece (fn ...)) which defines the function piece(get-in shape/pieces [p rotation])
shape/pieces refers to the pieces vector in the shape namespace[p rotation] with two arguments:p is a value between 1 and 7, representing one of the pieces: I, Z, S, J, L, T, and Orotation is a value between 0 and 3, representing the number of 90-degree rotationsAnother significant difference is that data is immutable in Clojure, while in Python it's mutable (like the pieces data structure).
However, a similarity is that both languages are dynamically typed, but uses concrete types in the compiled code:
;; Clojure
(class \Z) ;; Returns java.lang.Character
(class 2)  ;; Returns java.lang.Long
(class Z)  ;; Returns java.lang.Long (since Z is bound to 2)
# Python
type('Z')  # Returns <class 'str'> (characters are strings in Python)
type(2)    # Returns <class 'int'>
type(Z)    # Returns <class 'int'> (since Z is bound to 2)
The languages also share another feature: type information can be added optionally. In Clojure, this is done using type hints for Java interop and performance optimization. In Python, type hints (introduced in Python 3.5) can be added using the typing module, though they are not enforced at runtime and are primarily used for static type checking with tools like mypy.
Now let's continue by creating a board component:
poly create component name:board
Which adds the board component to the workspace:
▾ tetris-polylith
  ▸ bases
  ▾ components
    ▸ board
    ▸ piece
  ▸ development
  ▸ projects
The Clojure code that places a piece on the board is implemented like this:
(ns tetrisanalyzer.board.core)

(defn empty-board [width height]
  (vec (repeat height (vec (repeat width 0)))))

(defn set-cell [board p x y [cx cy]]
  (assoc-in board [(+ y cy) (+ x cx)] p))

(defn set-piece [board p x y piece]
  (reduce (fn [board cell]
            (set-cell board p x y cell))
          board
          piece))
For Clojure newcomers: the last parameter of set-cell uses destructuring to extract the first two elements from the vector argument [cx cy] into cx and cy.
Now let's create the board component for Python:
uv run poly create component --name board
This adds the board component to the workspace:
  ▾ components
    ▾ tetrisanalyzer
      ▸ board
      ▸ piece
  ▾ test
    ▾ components
      ▾ tetrisanalyzer
        ▸ board
        ▸ piece
The implementation looks like this in Python:
def empty_board(width, height):
    return [[0] * width for _ in range(height)]

def set_cell(board, p, x, y, cell):
    cx, cy = cell
    board[y + cy][x + cx] = p

def set_piece(board, p, x, y, piece):
    for cell in piece:
        set_cell(board, p, x, y, cell)
    return board
The test looks like this:
(ns tetrisanalyzer.board.core-test
  (:require [clojure.test :refer :all]
            [tetrisanalyzer.piece.interface :as piece]
            [tetrisanalyzer.board.core :as board]))

(def empty-board [[0 0 0 0 0 0 0 0 0 0]
                  [0 0 0 0 0 0 0 0 0 0]
                  [0 0 0 0 0 0 0 0 0 0]
                  [0 0 0 0 0 0 0 0 0 0]
                  [0 0 0 0 0 0 0 0 0 0]
                  [0 0 0 0 0 0 0 0 0 0]
                  [0 0 0 0 0 0 0 0 0 0]
                  [0 0 0 0 0 0 0 0 0 0]
                  [0 0 0 0 0 0 0 0 0 0]
                  [0 0 0 0 0 0 0 0 0 0]
                  [0 0 0 0 0 0 0 0 0 0]
                  [0 0 0 0 0 0 0 0 0 0]
                  [0 0 0 0 0 0 0 0 0 0]
                  [0 0 0 0 0 0 0 0 0 0]
                  [0 0 0 0 0 0 0 0 0 0]])

(deftest empty-board-test
  (is (= empty-board
         (board/empty-board 10 15))))

(deftest set-piece-test
  (let [T piece/T
        piece-t (piece/piece T 2)
        x 5
        y 13]
    (is (= [[0 0 0 0 0 0 0 0 0 0]
            [0 0 0 0 0 0 0 0 0 0]
            [0 0 0 0 0 0 0 0 0 0]
            [0 0 0 0 0 0 0 0 0 0]
            [0 0 0 0 0 0 0 0 0 0]
            [0 0 0 0 0 0 0 0 0 0]
            [0 0 0 0 0 0 0 0 0 0]
            [0 0 0 0 0 0 0 0 0 0]
            [0 0 0 0 0 0 0 0 0 0]
            [0 0 0 0 0 0 0 0 0 0]
            [0 0 0 0 0 0 0 0 0 0]
            [0 0 0 0 0 0 0 0 0 0]
            [0 0 0 0 0 0 0 0 0 0]
            [0 0 0 0 0 0 T 0 0 0]
            [0 0 0 0 0 T T T 0 0]]
           (board/set-piece empty-board T x y piece-t)))))
Let's execute the tests to check that everything works as expected:
poly test :dev
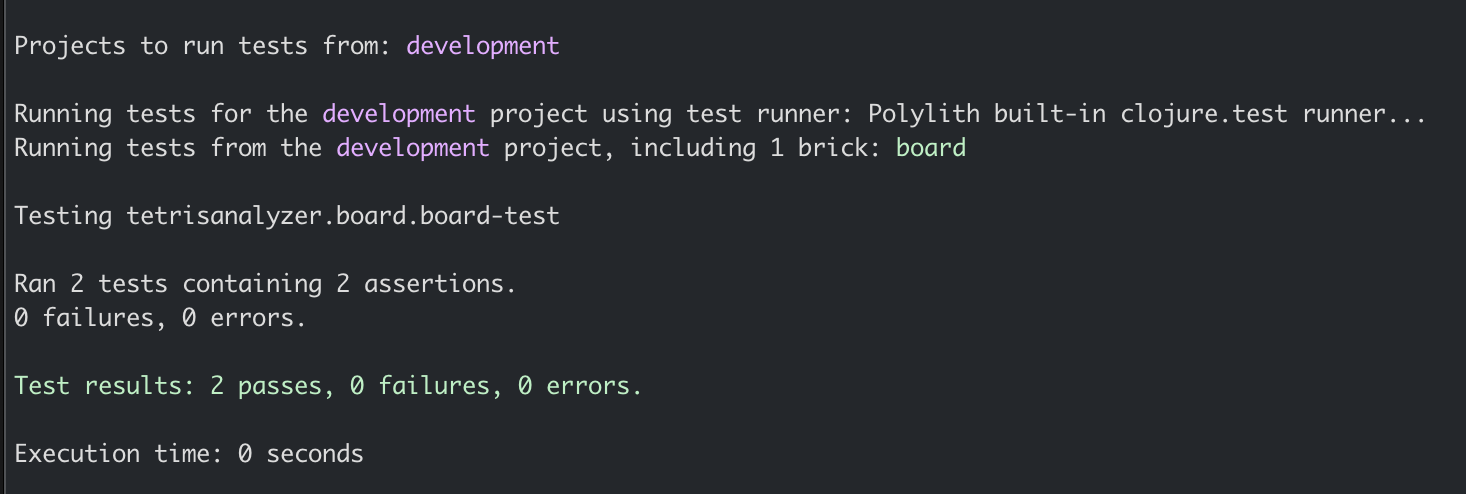
The tests passed!
Now, let's add a Python test for the board:
import unittest
from tetrisanalyzer import piece
from tetrisanalyzer.board import board

empty_board = [[0, 0, 0, 0, 0, 0, 0, 0, 0, 0],
               [0, 0, 0, 0, 0, 0, 0, 0, 0, 0],
               [0, 0, 0, 0, 0, 0, 0, 0, 0, 0],
               [0, 0, 0, 0, 0, 0, 0, 0, 0, 0],
               [0, 0, 0, 0, 0, 0, 0, 0, 0, 0],
               [0, 0, 0, 0, 0, 0, 0, 0, 0, 0],
               [0, 0, 0, 0, 0, 0, 0, 0, 0, 0],
               [0, 0, 0, 0, 0, 0, 0, 0, 0, 0],
               [0, 0, 0, 0, 0, 0, 0, 0, 0, 0],
               [0, 0, 0, 0, 0, 0, 0, 0, 0, 0],
               [0, 0, 0, 0, 0, 0, 0, 0, 0, 0],
               [0, 0, 0, 0, 0, 0, 0, 0, 0, 0],
               [0, 0, 0, 0, 0, 0, 0, 0, 0, 0],
               [0, 0, 0, 0, 0, 0, 0, 0, 0, 0],
               [0, 0, 0, 0, 0, 0, 0, 0, 0, 0]]

class BoardTest(unittest.TestCase):
    def test_empty_board(self):
        self.assertEqual(empty_board, board.empty_board(10, 15))

    def test_set_piece(self):
        T = piece.T
        piece_t = piece.piece(T, 2)
        x = 5
        y = 13
        expected = [[0, 0, 0, 0, 0, 0, 0, 0, 0, 0],
                    [0, 0, 0, 0, 0, 0, 0, 0, 0, 0],
                    [0, 0, 0, 0, 0, 0, 0, 0, 0, 0],
                    [0, 0, 0, 0, 0, 0, 0, 0, 0, 0],
                    [0, 0, 0, 0, 0, 0, 0, 0, 0, 0],
                    [0, 0, 0, 0, 0, 0, 0, 0, 0, 0],
                    [0, 0, 0, 0, 0, 0, 0, 0, 0, 0],
                    [0, 0, 0, 0, 0, 0, 0, 0, 0, 0],
                    [0, 0, 0, 0, 0, 0, 0, 0, 0, 0],
                    [0, 0, 0, 0, 0, 0, 0, 0, 0, 0],
                    [0, 0, 0, 0, 0, 0, 0, 0, 0, 0],
                    [0, 0, 0, 0, 0, 0, 0, 0, 0, 0],
                    [0, 0, 0, 0, 0, 0, 0, 0, 0, 0],
                    [0, 0, 0, 0, 0, 0, T, 0, 0, 0],
                    [0, 0, 0, 0, 0, T, T, T, 0, 0]]
        self.assertEqual(expected, board.set_piece(empty_board, T, x, y, piece_t))
We could run the tests using Python's built-in unittest framework like this:
uv run python -m unittest discover -s test -p "test_*.py" -v

However, pytest is a popular alternative, so let's install it:
uv add pytest --dev
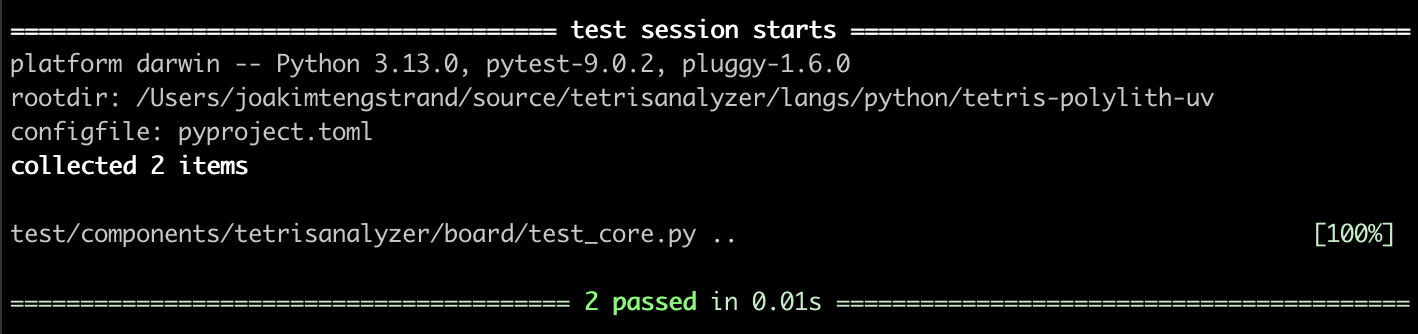
And run the tests:
uv run pytest
With that, we have finished the first post in this blog series.
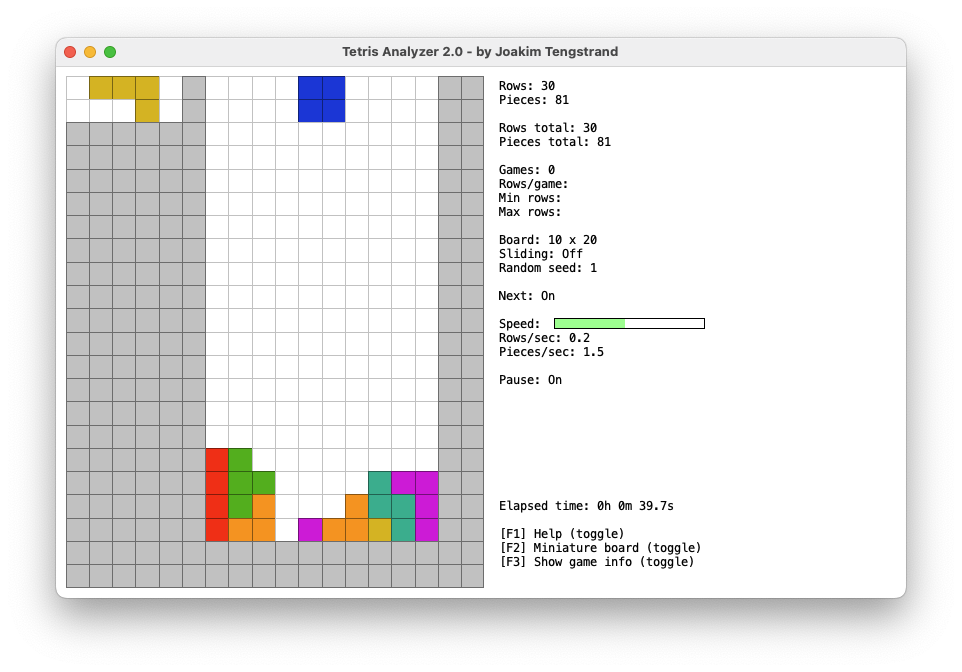
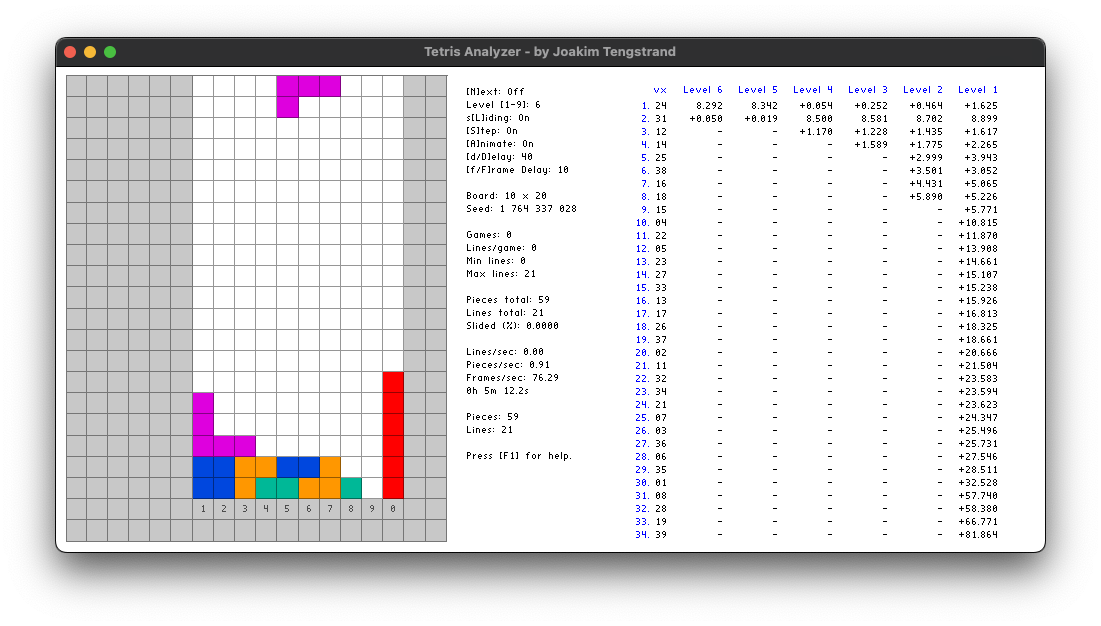
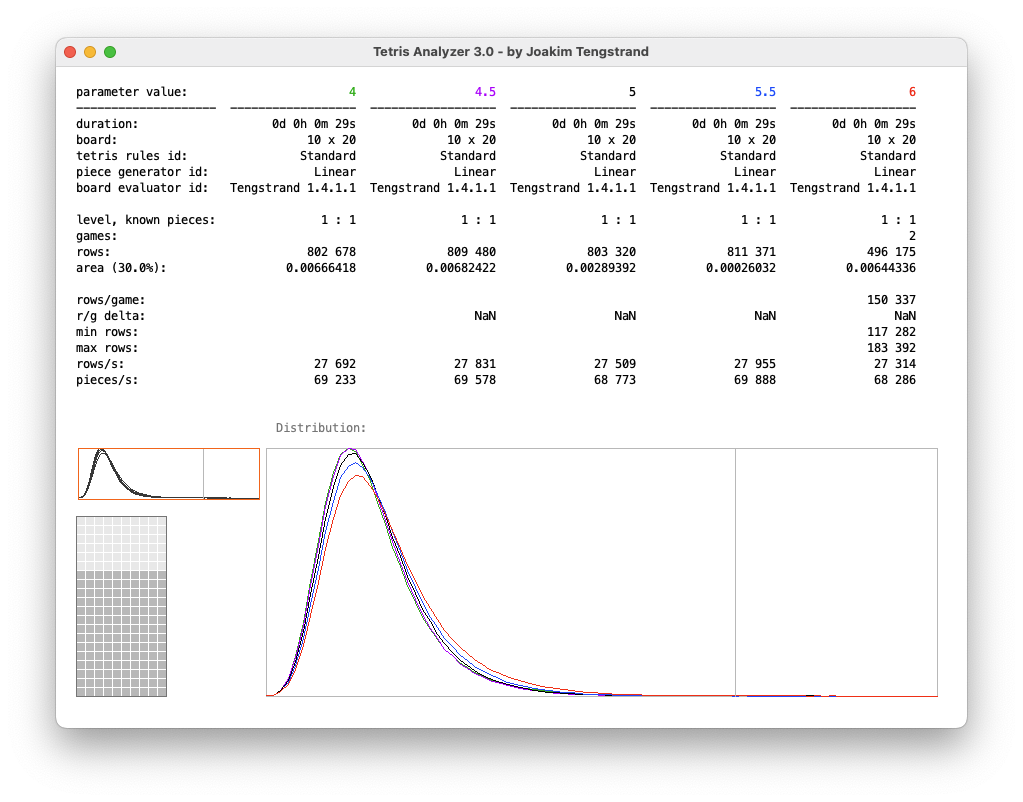
If you're eager to see a self-playing Tetris program, I happen to have made a couple in other languages that you can watch here.
Happy Coding!
Published: 2025-12-17